
When you're installing an electrical intercom system, you need to start with a clear understanding of your communication requirements and the layout of your space. Assess the number of units necessary and gather the right tools—wire strippers, drills, and multimeters are essential for a successful installation. You'll also need to follow the manufacturer's guidelines for wiring and mounting. Once you've tested the system's functionality, you'll want to contemplate potential troubleshooting strategies. But what happens when issues arise during the installation process?
Understanding Intercom Systems
When considering an intercom system, it's essential to understand its fundamental components and functionalities. An intercom system typically consists of a master station and multiple sub-stations. The master station serves as the main control unit, allowing you to initiate communication and monitor activity across various locations.
Sub-stations, installed in designated areas, enable two-way communication, providing the ability to communicate easily with others in the system. Each unit usually incorporates a speaker and microphone for clear audio transmission. Additionally, many systems offer video capabilities, allowing you to see who you're communicating with, enhancing security and convenience.
Wiring types—either wired or wireless—play a significant role in installation complexity and reliability. Wired systems often provide more stability, while wireless systems can be easier to install and more flexible.
Power sources vary as well; some systems require direct electrical connections, while others may operate on batteries or Power over Ethernet (PoE). Understanding these components will assist you in selecting the right intercom system for your needs and guarantee efficient installation, maintenance, and operation.
Assessing Your Communication Needs
Evaluating your communication needs is essential for selecting the right intercom system that fits your environment and requirements.
Start by identifying the primary purpose of the intercom. Are you using it for internal communication, security, or both? Understanding this will help you determine the necessary features.
Next, consider the size of your space. Are you working in a small office, a multi-story building, or an expansive warehouse? The size directly impacts the type of system you'll require. For instance, larger areas may need a system with multiple stations and interconnectivity options.
Think about the number of users. Are you communicating with a few people or a large team? This will influence the number of intercom units and the layout of the system.
Additionally, assess your specific communication requirements. Do you need video capabilities, or is audio sufficient?
Lastly, evaluate any existing infrastructure. Are there network restrictions or wiring constraints? Knowing these details will enable you to make a more informed decision, ensuring your intercom system meets your unique communication needs effectively.
Choosing the Right Equipment
When choosing the right equipment for your electrical intercom system, start by evaluating your specific communication needs.
Next, compare the features and prices of various models to find a balance that suits your budget and requirements.
Finally, consider the installation requirements to guarantee a seamless setup process.
Evaluate Your Needs
Choosing the right equipment for your electrical intercom system starts with a clear understanding of your specific needs.
Begin by examining the size and layout of your property. Do you need a system that covers multiple floors or a large outdoor area? This will determine whether you require wired or wireless intercoms, as well as the number of units necessary.
Next, consider the functionality you desire. Are you looking for audio-only communication, or do you want video capabilities? Video intercoms can enhance security but often come with additional costs and installation complexities.
Additionally, think about the ease of use. User-friendly interfaces and reliable connectivity are essential for everyday functionality.
You should also evaluate whether you need advanced features such as remote access, integration with smart home systems, or programmable options. Identifying these preferences will help you hone in on the right equipment that fits your lifestyle and security requirements.
Finally, don't forget about the environment where the intercom will be installed. Outdoor units need to be weather-resistant, while indoor units should complement your interior design.
Compare Features and Prices
Once you've assessed your needs, comparing features and prices of various intercom systems becomes key to making an informed decision.
You'll find that different models offer a range of functionalities, so it's vital to identify what aligns with your requirements.
Consider these essential features when comparing options:
- Audio Quality: Look for systems with noise-cancellation technology for clear communication.
- Range: Verify the intercom can cover the distance between units, especially in larger buildings.
- Integration Capabilities: Some systems allow integration with smart home devices, enhancing overall functionality.
Price variations can be significant, influenced by brand reputation, feature sets, and build quality.
Budget-friendly systems may offer basic functionality, while premium models provide advanced features and robust performance.
Always check warranty and customer support options, as these can save you money in the long run.
Lastly, read customer reviews to gauge real-world performance and reliability.
By balancing features and prices, you'll find an intercom system that meets your needs without overspending.
Making an informed choice here sets the stage for a successful installation and effective communication throughout your space.
Consider Installation Requirements
A thorough understanding of installation requirements is essential for selecting the right intercom equipment.
You'll want to assess the layout of your space, including the number of entry points and distances between units. This will help determine the system's wiring needs, whether you opt for wired or wireless solutions.
Next, consider power requirements. Some intercoms need a dedicated power source, while others may run on batteries. Make certain you have accessible outlets and adequate battery life for your chosen system.
Don't forget to check compatibility with existing infrastructure. If you're integrating an intercom into a complex setup, like a security system or home automation network, verify that the equipment can communicate effectively with your current devices.
Climate factors also play a role. If you're installing outdoor units, make certain they're weather-resistant and suitable for your local conditions.
Finally, review installation complexity. Some systems may require professional installation, while others are user-friendly and can be self-installed.
Understanding these requirements not only makes certain you select the right equipment but also guarantees seamless functionality once installed.
Planning the Installation Layout
When planning your electrical intercom system installation layout, it's crucial to take into account the flow of communication and accessibility.
Start by mapping out the areas where you'll need intercom units. Consider the distance between units and the potential for interference. This guarantees that everyone can communicate clearly without disruptions.
To create an efficient layout, focus on the following key aspects:
- Centralized locations: Position your main intercom unit in an easily accessible area, like the entrance or reception, to facilitate communication.
- Strategic placement: Install secondary units in high-traffic areas such as hallways, conference rooms, or break rooms to maximize usage.
- Clear sightlines: Confirm that the units are visible and reachable, reducing the chance of miscommunication or missed messages.
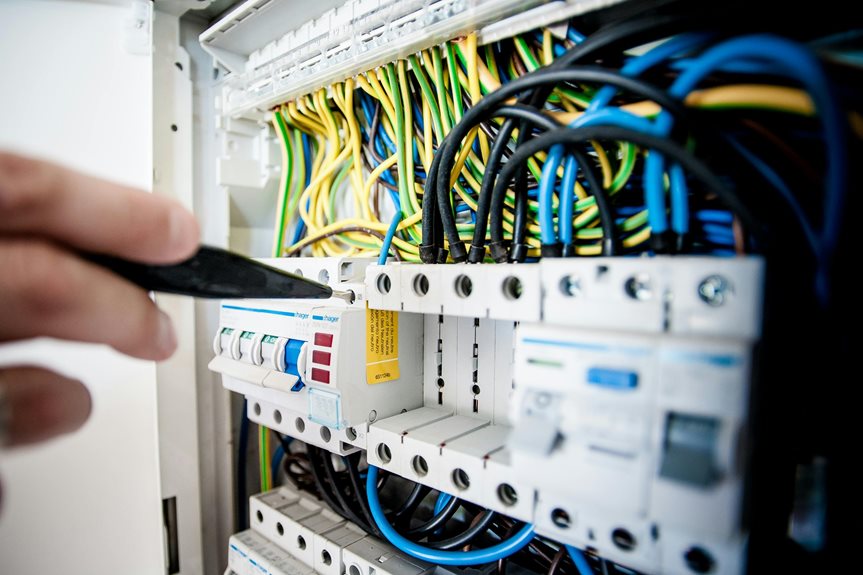
Required Tools and Materials
Before you start your electrical intercom system installation, it's vital to gather the right tools and materials.
You'll need essential tools for installation, a variety of wiring materials, and a checklist for safety equipment to guarantee a smooth process.
Let's break down each of these components to help you prepare effectively.
Essential Tools Needed
Gathering the right tools and materials is vital for a successful electrical intercom system installation. Having the proper equipment on hand not only streamlines the process but also guarantees safety and efficiency.
Here are three vital tools you'll need:
- Wire Strippers: These are indispensable for removing insulation from the wires without damaging the conductors.
- Drill with Bits: A power drill will help you create holes for mounting the intercom units, guaranteeing a secure fit.
- Screwdriver Set: Different types and sizes of screwdrivers will be necessary for securing the units and making connections.
In addition to these tools, you should also have a multimeter for testing connections and confirming proper voltage levels throughout the installation.
A measuring tape will help you accurately measure distances between units, while a level guarantees your intercoms are installed straight.
Don't forget safety gear such as gloves and safety glasses to protect yourself during the installation process.
Wiring Materials Overview
Selecting the right wiring materials is vital for a reliable and efficient electrical intercom system installation. You'll need to choose between several types of wire, with the most common being twisted pair and coaxial cables. Twisted pair cables are ideal for voice transmission due to their low interference levels, while coaxial cables can support video signals and longer distances.
For your installation, a minimum of 18 AWG (American Wire Gauge) is recommended for twisted pair wiring to guarantee peak performance. If you're considering running video signals, opt for RG-59 coaxial cable, which provides excellent signal quality.
You'll also need connectors and termination points. RJ-45 connectors are typically used for twisted pair cables, while BNC connectors are standard for coaxial cables.
Don't forget about junction boxes and cable ties; these help organize and protect your wiring. Insulation is another vital factor. Choose materials that can withstand environmental factors if your installation involves outdoor wiring.
Finally, consider using shielded cables if you're in a high-interference area to maintain signal integrity. By carefully selecting your wiring materials, you can greatly enhance the performance and longevity of your intercom system.
Safety Equipment Checklist
Guarantee safety while installing your electrical intercom system by having the right tools and materials on hand. A thorough safety equipment checklist is essential for a smooth installation process.
Here's what you need to gather:
- Insulated gloves: Protect your hands from electrical shock while handling wires and connections.
- Safety goggles: Shield your eyes from debris or accidental sparks during drilling and installation.
- Voltage tester: Verify the circuits aren't live before you begin any work, preventing potential hazards.
Before starting your installation, double-check that you have all necessary items.
Wearing appropriate safety gear can notably reduce the risk of injury. Additionally, having the proper tools—like wire strippers and screwdrivers—will enhance your efficiency and effectiveness during the installation.
Step-by-Step Installation Process
Begin by evaluating the layout of your space to determine the ideal locations for the intercom units. You'll want to guarantee that each unit is easily accessible and in a central location within its designated area. Once you've mapped out the positions, follow these steps for installation:
- Prepare the Wiring: Run the necessary cables from your main unit to each intercom location, guaranteeing they're hidden and secured.
- Install the Backplates: Mount the backplates at the designated locations using screws and a level to guarantee they're straight.
- Connect the Wires: Strip the wire ends and connect them to the intercom units according to the manufacturer's instructions.
- Mount the Intercom Units: Securely attach the intercom units to the backplates, guaranteeing they fit snugly.
To visualize your layout, here's a simple table to help:
| Location | Intercom Type |
|---|---|
| Entrance Hall | Master Unit |
| Living Room | Slave Unit |
| Kitchen | Slave Unit |
| Bedroom | Slave Unit |
Follow these steps carefully, and your intercom system will be ready for the next phase of installation.
Testing the System Functionality
Once you've successfully mounted the intercom units and connected the wiring, it's time to test the system functionality to guarantee everything operates as intended.
Start by ensuring all units are powered on. You should hear a confirmation beep from each unit, indicating they're ready for use.
Next, follow these steps to conduct a thorough test:
- Check audio clarity: Make a call from one unit to another. Listen for any distortion or static that could indicate wiring issues.
- Test the door release function: If your system includes a door release, activate it while monitoring the response on the other end.
- Assess intercom range: Walk around your premises while using the intercom, ensuring you maintain a clear connection and that sound quality remains consistent.
After completing these tests, document any irregularities.
If everything functions properly, you've successfully set up your intercom system. If not, you may need to revisit your installation steps or consider further troubleshooting, which we'll cover in the next section.
Enjoy the convenience and security your new intercom system provides!
Troubleshooting Common Issues
Troubleshooting common issues with your electrical intercom system is essential for maintaining peak performance. Start by checking the power supply; verify that the unit is plugged in and that circuit breakers aren't tripped. If you're experiencing no sound, verify that the volume settings aren't muted or too low.
Next, inspect the connections. Loose or corroded wires can cause interruptions. Confirm all connections are secure and free from rust.
If you're dealing with static or poor audio quality, it may be due to interference. Move any electronic devices away from the intercom and check for nearby wireless signals that could disrupt communication.
For issues with the intercom not ringing, confirm that the doorbell or alert settings are correctly configured. Also, assess the wiring between the door unit and the main unit; damaged wires can lead to failures.
If you notice a delayed response, reboot the system by unplugging and re-plugging it after a minute. If problems persist, consult your user manual for further diagnostics or consider contacting a professional technician.
Regularly addressing these common issues will help guarantee your intercom system operates smoothly and efficiently.
Maintenance and Upgrades
Maintaining and upgrading your electrical intercom system is essential for guaranteeing its longevity and peak performance. Regular maintenance helps you identify potential issues before they escalate, while upgrades keep your system current with technological advancements.
Here are a few key maintenance tips to take into account:
- Inspect Connections: Regularly check all wiring and connections for signs of wear or corrosion. This guarantees peak signal transmission and reduces the risk of system failure.
- Test Components: Periodically test each intercom unit to confirm functionality. Address any malfunctioning components immediately to maintain communication effectiveness.
- Software Updates: If your system includes software, keep it updated to benefit from the latest features and security enhancements.
Conclusion
In summary, by carefully coordinating your components and conducting an extensive installation, you can create a reliable intercom system. Thoughtful testing and timely troubleshooting will keep your communication clear and consistent. Remember, regular maintenance and potential upgrades will enhance your system's longevity and performance. So, whether you're connecting corridors or communicating across campuses, a well-installed intercom guarantees seamless sound and satisfaction. Embrace the efficiency of effective electrical intercom systems today!